v20
Pre-Requisite
- Ensure you've followed Activating the Microsoft 365 Integration before proceeding.
Expected Behavior
There are two functions to the sync behavior, from the phone system to Teams and the reverse.
These default status mappings can be changed (in some ways) with the assistance of support.
Update presence from Apps (phone system) to Teams clients
When the user changes their status in the softphone or mobile app, the following status change will be made in Teams
- Available: Available
- Away: Away
- Do Not Disturb: Do not Disturb
Update presence from Teams clients to Apps (phone system)
When the user changes their status in the Teams, the following status change will be made in the phone system
In order for this to work properly, you must complete a couple additional steps.
- Available: Available
- Available (idle): Available
- Away: Away
- Be Right Back: Away
- Busy: Do not Disturb
- Busy (idle): Do Not Disturb
- Do Not Disturb: Do Not Disturb
- In a call: Do Not Disturb
- In a meeting: Do Not Disturb
Tips and Gotchas
If you are using Presence sync, the following considerations need to be made:
- Custom Statuses are incompatible, as Custom Statuses will always override the native phone status
- Users who step away from their desk for a couple minutes, even with their headset on ready to take a call, may end up in the Teams Idle status, which when synced will log them out of queues. This will also usually occur upon locking Windows.
- The same behavior may be a benefit, to log users out of queue when they forget to logout themselves. Especially useful for Skill Based Call Routing.
Enable Sync
- Login to the phone system admin portal
- Open the phone system in question
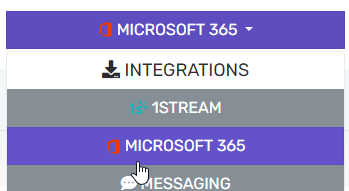
- Go to Integrations > Microsoft 365
- Set Update presence from Apps to Teams clients to Yes
- Set Update presence from Teams clients to Apps to Yes
- Click Save changes at the top
If you setup the Teams > Apps direction:
- On the Dashboard/Overview page go to Open Phone System Console
- Go to Admin in the bottom left, then Users in the left column
- Go to M365 at the top
- Under the Teams Synchronization section, click the Authorize button
- Login as a Microsoft administrator, but you do not need to consent for the organization.
- Click Save at the top
v18
This is NOT Teams Presence Sync
With the backend v20 release, additional options will be available to sync your status directly with Teams which should have less pitfalls than syncing against Outlook. Until then this may be a suitable stopgap to help prevent calls during Teams meetings.
Pre-Requisite
- Ensure you've followed Activating the Microsoft 365 Integration before proceeding.
Enable Sync
- Login to the bvoip phone system
- In the top right go to Integrations > Microsoft 365
- Go to the Calendar Sync tab
- Check the Enable calendar sync box
- Adjust the synchronization mode to Sync only the users listed below, unless you want to sync all users.
- Click Add User(s) and add the users you want to synchronize.
- Click Save Changes

- When your Outlook status updates for a meeting, your phone system presence status will also change.