Incompatibility Notice
Cisco phones are not compatible with our Managed Provisioning Portal. This phone type will need to be manually provisioned.
Pre-Provisioning Steps
Before attempting to provision the desired phone, ensure that you have factory reset the device.
For information on completing these tasks before provisioning the desired device, please see the following articles:
Manually Provisioning the Cisco SPA Phone
- Press the dog-eared page button.
- Scroll down to the Network option.
- Press the Select button.
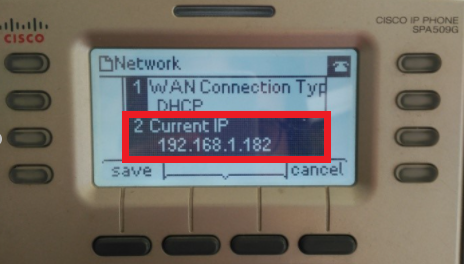
- Point 2 will show you the IP of the phone. This is the IP needed to access the phone admin screen. You won’t be required to create a password.
- Click on the Admin Login link.

- Click on the Advanced link.

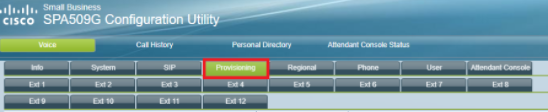
- Click on the Provisioning tab.
- Scroll down to the Profile Rule field.
- In the Profile Rule field, ensure that the provisioning link is added from the phone provisioning section of the 1Stream portal for the desired extension.

- Click on the Submit All Changes button.
- Press the dog-eared page button on the phone.
- Scroll down to the Reboot option.
- Press the Select button.
It will take several minutes for the factory reset process to be completed. The phone should reboot once for firmware to update and a second time to fully reboot.
Phone Still Not Provisioned?
If the phone has not provisioned with either sets of instructions, please refer to our Phone Provisioning Troubleshoot Guide.