The Progressive Dialer feature allows for call agents to be able to jump into different calling lists that are pre-setup from different API integrations.
Creating the Dialing List
- Log into the 1stream portal.
- Go to Administration > Dialer Jobs/Campaigns in the top right.
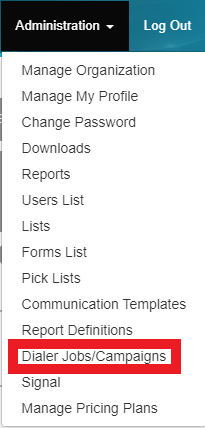
- Click the Add New link. The Add New Dialer Job pop-up will appear.

- In the Title field, name the dialer job.
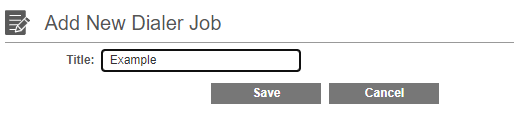
- Click the Save button. The page will refresh to display the Manage Dialer Job Number page.
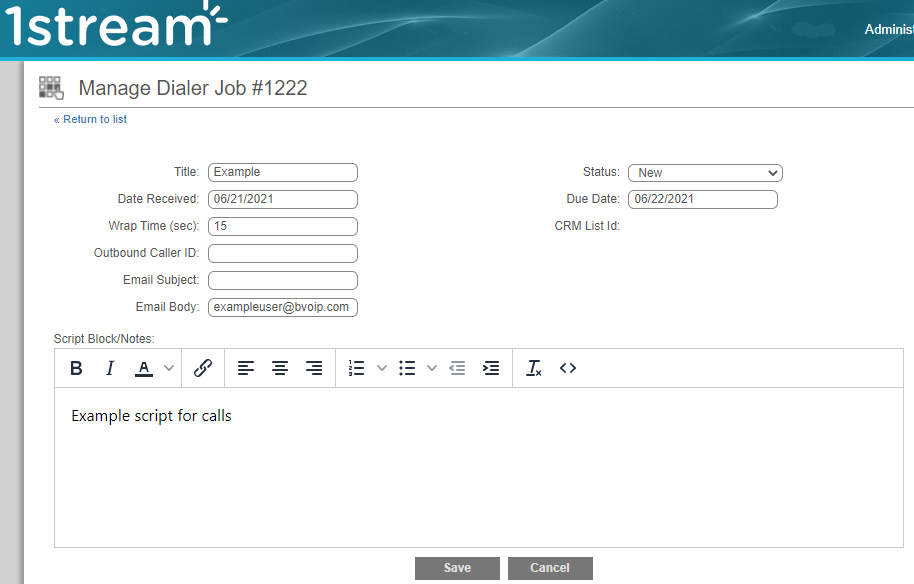
- In the Wrap Time (Sec) field, set the seconds that a call agent will have to wrap-up their notes after each call.
- In the Outbound Caller ID field, set the callback ID intended for the dialer job.
- If you'd like to send a follow up email, you can populate teh Email Subject and Email Body fields.
- You can use the following replacement variables in the email: {FirstName}, {Company}, {PhoneNumber}
- In the Script Notes textbox, insert a call script to be used by call agents for the calls associated with this dialer job.
- In the Status drop-down, select the Dialing option to activate the call list once saved.
- Scroll down to the Contacts section.
- Click the import icon to import a CSV file. A pop-up will appear to select a file from the local computer.

- Once a file has been selected, the data will be parsed and fields will need to be mapped to columns.
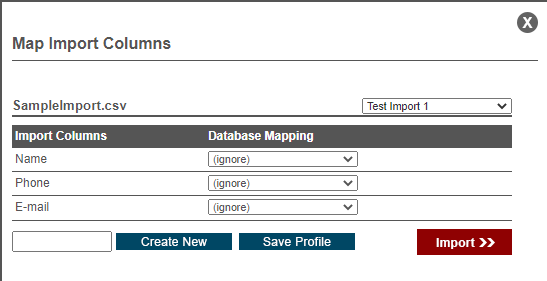
- In the top drop-down, select a previous import profile, if desired. This is for the ability to reload a mapping if using the same file format frequently.
- In the Database Mapping column, select the table in the each drop-down that should apply to the items in the Import Column.
- Click on the Import button. Once done, the system will give you a confirmation message and you will be able to see the accounts imported, total accounts to dial and accounts remaining numbers update.

Create a New Import Profile
- Click on the bottom field next to the Create New button.
- Add the desired Profile Name in the text field.
- Make sure that the drop-downs in the Database Mapping column are filled out. At minimum, one mapping should be filled out.
- Click the Create New Button.
To save to an existing profile, select the existing profile from the drop-down, update the mapping and click on the Save Profile button.