Pre-Provisioning Steps
Before attempting to provision the desired phone, ensure that you have factory reset and updated firmware on the device and enabled MPP for the desired extension.
For information on completing these tasks before provisioning the desired device, please see the following article:
Once the phone template has been saved, it is time to factory reset the device.
Programming Additional Handsets
For additional handsets, each one must be registered via the base's web UI as additional accounts and set to the handset. This will need to be done for each handset to be synced up with the base.
- Log into the wireless base UI.
- Go to the Status section.
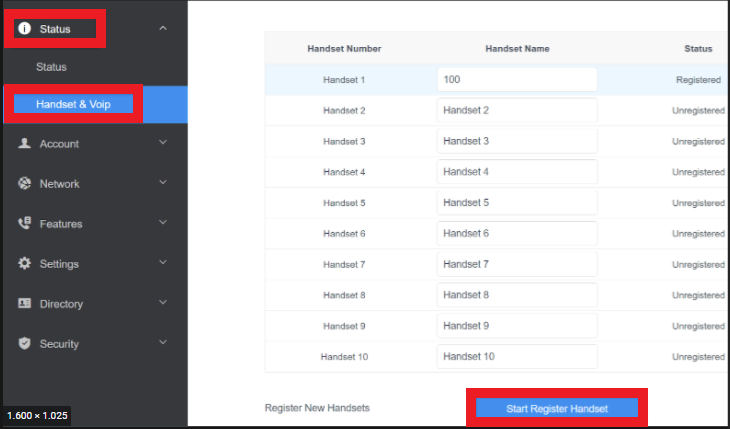
- Navigate to the Handset & VOIP subsection.
- Click on the Start Register Handset button.
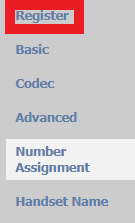
- Go to the Account tab.

- Location the Register section.
- In the Label field, input the desired Name for the device.
- In the Display Name field, input the extension number and extension user's name.
- In the Register Name field, input the extension's authorization ID.
- In the Username field, input the extension number.
- In the Password field, input the extension's authorization password.
- Scroll down to the SIP Server 1 section.
- In the Server Host field, input the phone system name.
- Scroll down to the SIP Server 2 section.
- In the Enable Outbound Proxy Server drop-down, select Enabled.
- The Proxy ports should be set to 5056.
- In the Outbound Proxy Server fields, input the parameters from the base device.
- Click the Confirm button.
The phone will then be provisioned.
Yealink MP Series
The Yealink MP phone series does not support DSS key as BLF in hybrid mode. If you are wishing to have a phone that supports BLF keys, then it is recommended to use a Yealink non-Teams based phone.